
 By Rbia Eman
A natural makeup look lets your skin shine while you still look polished. It uses soft shades, light textures, and smart blending to give a fresh finish.
Many people love this style but feel unsure about where to start. This guide walks you through every step, from skincare prep to all-day wear.
You will learn the best products, easy tutorials, and fixes for common mistakes. Each section gives clear answers, so you can apply the tips right away.
What Is a Natural Makeup Look?
A natural makeup look enhances your real skin instead of covering it up. The result looks healthy, smooth, and effortless, as if you woke up glowing.
Why “No-Makeup Makeup” Is So Popular
Beauty fans call this trend “no-makeup makeup,” and it keeps growing every year. You still wear products, but the finish looks like your best skin day.
People love it because it saves time, feels light, and suits almost every age. It also works at the office, at school, or at a weekend brunch.
Light makeup also feels more comfortable during a long day of work or travel. You avoid cakey patches, creasing, and the heavy lines that thick foundation leaves.
How to Choose Shades That Match Your Skin
Pick colours that already exist in your skin for the most believable finish. Your base should blend into your jawline and neck without a visible edge.
Use these simple rules:
- Base: match the shade to your neck and jawline in daylight.
- Blush: choose the colour your cheeks turn after a brisk walk.
- Lips: pick a tone that sits close to your natural lip colour.
Undertone plays a big role in shade choice, so test colours near a window. Cool undertones suit rose and soft pink, while warm undertones suit peach and apricot.
Best Product Textures for a Natural Finish
Texture matters as much as colour, because heavy formulas sit on top of the skin. Thick layers can look mask-like, while light creamy products melt in and look like skin.
| Product | Best Texture | Why It Works |
| Base | Tinted serum or skin tint | Light cover keeps your real skin visible |
| Blush | Cream or liquid | Melts in for a natural flush |
| Bronzer | Cream | Blends without patches |
| Highlighter | Cream or liquid | Adds glow without glitter |
| Lips | Sheer balm or tint | Gives soft colour without weight |
| Eyes | Cream shadow | Pats on fast with your fingers |
Cream products also save time, because you can pat them on with your fingers.
Natural Makeup vs Soft Glam: What’s the Difference?
Natural makeup and glam sound like opposites, but they blend together beautifully. Makeup artists call this happy middle ground soft glam, and it suits most faces.
How to Find the Right Balance
Soft glam still looks like you wear very little makeup, so blending matters most. Buff each product until the edges fade, so skin and makeup look like one.
| Feature | Natural Look | Soft Glam |
| Base | Light coverage | Light to medium coverage |
| Eyes | Bare or one soft wash | Neutral shades with soft shimmer |
| Brows | Brushed up | Brushed up and lightly filled |
| Lips | Tinted balm | Glossy, sheer colour |
| Time | About 5 minutes | About 10 minutes |
Soft Glam Eye Shades and Brow Tips
Your eyes set the tone for soft glam. Keep the palette neutral and the blending soft.
- Eyeshadow: stick to soft browns, golds, and copper shades.
- Shimmer: tiny metallic flecks catch the light and add a low-key glow.
- Brows: brush them upward with brow mascara for a soft, fluffy shape.
- Lashes: add length, lift, and volume for a fluttery finish.
Glossy vs Sheer Lips
Glossy lips look instantly glamorous, and the shine makes your lips look fuller. A sheer finish with low pigment keeps the look soft and natural.
Use your fingers for a sheerer finish, or a brush for more precision. Try the sheer version for day and the stronger version for night.
Skincare Prep: The Secret Behind a Natural Makeup Look
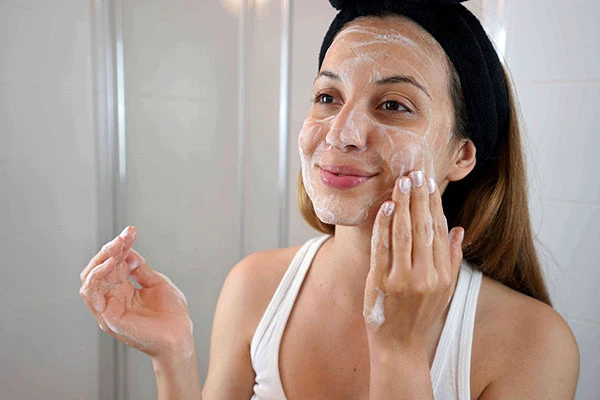
Skincare is the real secret behind a glowing natural makeup look. Healthy skin holds makeup better, so products go on smoother and last longer.
You will also need less base when your skin looks even and hydrated.
Cleanse
Good skin starts with a proper cleanse, not a quick swipe of a wipe. Use a gentle cleanser and running water to remove dirt, oil, and old makeup.
At night, double cleanse. Remove your makeup first, then wash again to clear your pores.
Exfoliate
Skin renews itself more slowly as you age, so dull cells build up on the surface. Gentle exfoliation clears those cells away and brings back your natural glow.
- PHA: larger molecules work slowly and feel very gentle.
- AHA: smaller molecules work faster and feel stronger.
- BHA (salicylic acid): great for oily skin and helps reduce breakouts.
Start with two nights a week and watch how your skin reacts.
Serum
Serums hold the highest level of active ingredients in your routine. Choose one that targets your main skin concern.
| Ingredient | Main Benefit |
| Vitamin C | Brightens and adds glow |
| Niacinamide | Balances oil flow |
| Hyaluronic acid | Boosts hydration |
| Retinal | Softens fine lines |
| Peptides | Supports plumpness and elasticity |
Moisturiser
Moisturiser locks in water and oil and forms a protective layer on your skin. It also helps keep out pollution and bacteria.
Look for niacinamide, peptides, or barrier-building ingredients for extra support. A hydrated canvas helps base and cream products blend evenly.
SPF
Wear SPF 30 or higher every day, even in winter. UVA rays cause most premature ageing, and they pass through clouds.
Apply sunscreen as your last skincare step. Let it settle for a few minutes before you start your makeup.
Natural Makeup Look Essentials: Products and Tools You Need
You do not need a full makeup bag for this style. A small kit of six or seven items covers everything.
Tinted Serum, Skin Tint and Light Foundation
Choose a base with light to medium coverage. Tinted serums and skin tints hydrate your skin while they even out your tone.
Apply a thin layer with your fingers and build only where you need more cover. Common spots include the sides of your nose, your chin, and any redness.
Cream Blush, Bronzer and Highlighter
Cream products melt into your base and give a lit-from-within glow. They look far more natural than powder on most skin types.
- Cream blush: pat it high on the cheeks for a youthful lift.
- Cream bronzer: add warmth to your temples, cheeks, and jawline.
- Highlighter: tap it on your cheekbones and brow bones for glow.
Brow Gel and Mascara
Brows and lashes frame your face without adding weight. A tinted brow gel and one good mascara do most of the work.
Brush your brows upward to add depth and a fluffy shape. Coat your lashes once to add length and volume without a clumpy look.
Sheer Lip Colour and Lip Gloss
Pick a lip colour that mimics your natural shade. Sheer balms, tints, and light glosses all give a fresh, soft finish.
A multi-use cream for lips and cheeks also keeps your kit small. Using one shade on both areas makes the look feel matched and calm.
Brushes, Sponges and Fingers
Your tools change how a product looks on your skin. Fingers add warmth, so cream products melt in more easily.
| Tool | Best For | Finish |
| Fingers | Cream blush, tint, lip colour | Soft and sheer |
| Damp sponge | Skin tint and foundation | Seamless and skin-like |
| Fluffy brush | Bronzer and powder | Airy and blended |
| Dense brush | Pressing in foundation | Slightly more coverage |
How to Create a Natural Makeup Look Step by Step
This routine takes about five to ten minutes. Follow the steps in order for the best result.
Step 1: Prep the Skin
Massage in your moisturiser and let it sink in for a minute. Dry skin needs a rich cream, while oily skin prefers a light gel.
Add your SPF last. Wait a moment before you move on to makeup.
Step 2: Apply a Light Base
Dot a tinted serum or skin tint on your cheeks, forehead, and chin. Blend it out with your fingers or a damp sponge.
Build extra cover only where you need it, such as around your nose. Leave the rest of your skin bare so it can glow through.
Step 3: Set Brows and Lashes
Brush your brows upward with a tinted gel to add depth. This creates a soft, fluffy shape that lifts your whole face.
Then coat your lashes with one layer of mascara. One coat is enough for a natural finish.
Step 4: Add Cream Blush for a Natural Flush
Pat cream blush onto the apples of your cheeks with your fingertips. Lift the placement slightly upward for a fresh, youthful flush.
Blend the edges until the colour fades softly into your skin. Build slowly, because you can always add more.
Step 5: Finish with a Sheer Lip
Use the same product on your lips for a matching look. Press it on with your fingers for a sheer finish.
This keeps the whole face simple and balanced. Add a touch of gloss if you want extra shine.
Natural Makeup Look for Different Skin Types
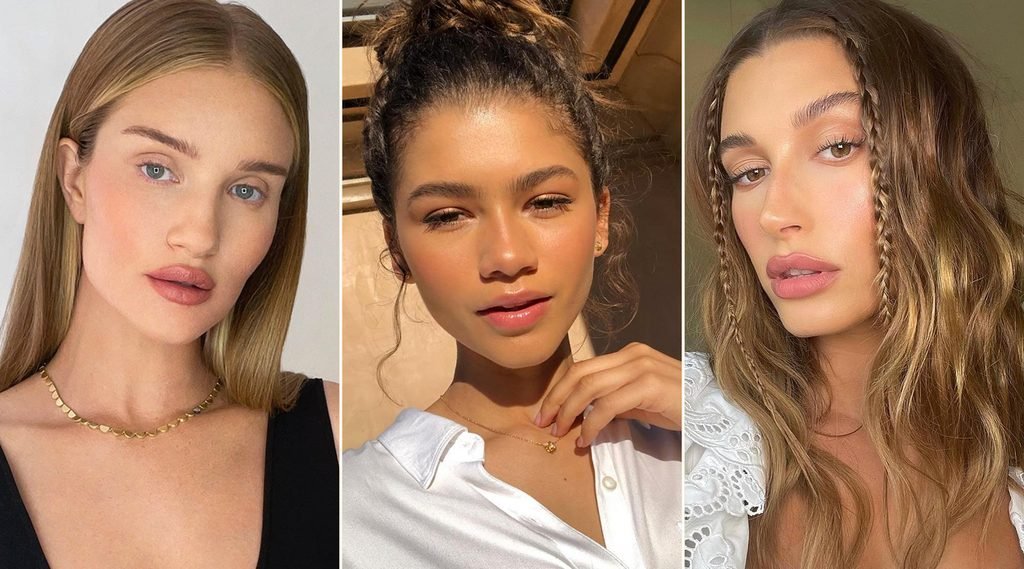
Every skin type needs a slightly different approach. Small changes in prep and texture make a big difference.
Natural Makeup Look for Dry Skin
Start with a nourishing moisturiser, because dry skin drinks up product quickly. Hydration always comes first for this skin type.
Use a tinted serum with a dewy finish, and layer it where you need cover. Then pat cream blush and highlighter on the high points of your face.
Natural Makeup Look for Oily Skin
Prep with a niacinamide moisturiser to help balance oil across your face. Then press a soft matte foundation into your skin with a brush.
Pressing pushes the product into your skin and helps it last longer. Add a little extra cover on your t-zone, and buff blush gently so the base stays put.
Natural Makeup Look for Combination Skin
Combination skin needs two mini routines on one face. Treat each zone by its own needs.
- T-zone: use a light gel moisturiser and a soft matte base.
- Cheeks: use a richer cream and a dewy tint.
- Blush and highlighter: keep them on the cheeks, away from oily areas.
Natural Makeup Look for Mature Skin
Skin changes with age, so hydration matters even more. Choose creamy, lightweight formulas that do not settle into fine lines.
Skip heavy powder, because it can highlight texture. Peptide moisturisers and cream blush give a soft, plump, healthy look.
How to Make Your Natural Makeup Last All Day
A great look means little if it fades by noon. A few smart habits keep your makeup fresh from morning to night.
Tips for Dry Skin
Very dry skin can soak up your base until it disappears. Moisturise well and use a comforting cleanser with a gentle exfoliant.
If your glow fades, use highlighter and cream bronzer to bring back shine. Place highlighter on the tops of your cheekbones and brow bones.
Tips for Oily Skin
The goal is glowy, not greasy. Too many glow products can make oily skin look shinier.
Balance oil with a mattifying balm on your forehead, nose, and upper lip. Sweep it on before your base, and use it again for top-ups.
Quick Touch-Ups on the Go
Keep a tiny kit in your bag for fast fixes:
- Blotting papers: press them on shiny spots without moving your makeup.
- Mattifying balm: dab it on the t-zone to reduce shine.
- Cream blush: tap a little on your cheeks to bring back colour.
- Lip balm or tint: refresh your lips in seconds.
Common Natural Makeup Mistakes to Avoid
Small errors can make a soft look feel heavy or flat. Watch out for these four common problems.
Using Heavy or Thick Products
Thick foundation and dry powders sit on top of your skin. They can make your face look flat and mask-like.
Switch to light, creamy formulas that melt in. If you need more cover, build it in thin layers.
Choosing the Wrong Base Shade
A base that does not match will show at your jawline. Even a small colour gap ruins a natural finish.
Always test shades on your jaw and neck in daylight. Pick the one that disappears into your skin.
Skipping Skincare and SPF
Makeup cannot fix dull or dry skin on its own. Without prep, products cling to dry patches and fade fast.
A simple routine of cleanser, moisturiser, and SPF solves most issues. Do not skip SPF, even on cloudy days.
Not Blending Enough
Harsh lines break the natural effect right away. Blend around your jaw, hairline, and blush edges.
Take an extra minute to buff everything out. Soft edges make your makeup look like real skin.
Natural Makeup Look Ideas for Different Occasions

You can adjust this style for almost any event. Small tweaks in colour and shine change the mood.
Everyday and Office Look
Keep the base light and choose a soft pink or peach blush. Brush your brows up and add one coat of mascara.
Finish with a sheer tint or balm on your lips. This look takes only five minutes and stays comfortable all day.
Date Night Soft Glam
Add a wash of warm brown or copper shadow with a hint of shimmer. Layer a second coat of mascara for more lift.
Swap your lip tint for a glossy sheer colour. Add a little highlighter to your cheekbones for extra glow.
Natural Makeup Look for Weddings and Events
Long events need a bit more staying power. Press your base in with a sponge, and use a light setting powder only where needed.
Choose waterproof mascara for happy tears. Keep blush and lip colour in cream form, and carry them for touch-ups.
FAQs About Natural Makeup Looks
How Do I Do a Natural Makeup Look for Beginners?
Start with skincare, then apply a light base, brow gel, one coat of mascara, cream blush, and a sheer lip. Use your fingers to blend everything.
Keep every layer thin and build only where you need it. The whole routine takes about five to ten minutes.
Which Products Do I Need for a Natural Makeup Look?
You need a tinted serum or skin tint, cream blush, brow gel, and mascara. A sheer lip balm or tint completes the kit.
Cream bronzer and highlighter are optional extras. A moisturiser and SPF make sure your skin looks its best underneath.
How Long Does a Natural Makeup Look Take?
A basic natural makeup look takes about five minutes once you know the steps. A soft glam version takes around ten minutes.
Cream products speed things up, because you can pat them on with your fingers. Practice helps you get faster each time.
Can I Wear a Natural Makeup Look on Oily Skin?
Yes, you can. Choose a soft matte foundation and a niacinamide moisturiser to balance oil.
Use a mattifying balm on your t-zone and keep glow products on your cheekbones only. Blotting papers help with midday shine.
How Do I Make Natural Makeup Last Longer?
Prep your skin with moisturiser and SPF, then press your base into the skin. Pressing helps the product grip and last.
Apply cream products in thin layers and blend well. Carry a small touch-up kit for shine control and fresh colour.